
Dynamic groups organize workspace members using user attributes sent by your identity provider through SCIM. You define membership rules using supported attributes, such as department or location. As those attributes change, group membership updates to include people who match the rules and remove people who no longer match.
For example, a dynamic group can include members whose department is Engineering and whose location is London. You manage the rules in ChatGPT Admin, while your identity provider supplies the user attributes.
Before you begin
- Sign in as a workspace owner or admin in a workspace where dynamic groups are available.
- Configure SCIM provisioning for your workspace and make sure your identity provider sends the attributes you want to use.
- Choose attribute values that match the values your identity provider sends. See the supported attributes and payload paths in this guide.
Group membership and feature permissions are separate. A member’s applicable roles, seat type, and product eligibility still determine access. See Groups and provisioning for the access model.
Create a dynamic group
- Open ChatGPT Admin and select your workspace.
- Under Identity & access, select Groups & roles.
- Select Create group using the + button.
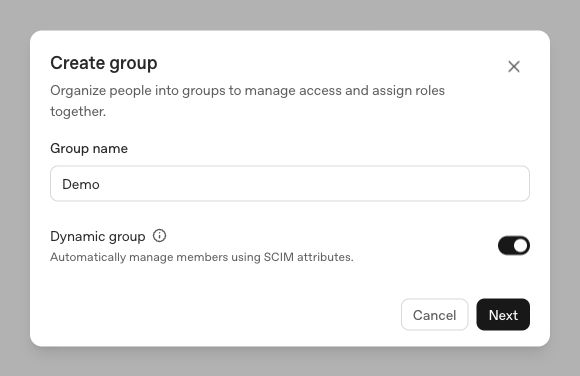
- Enter a group name, such as Demo, turn on Dynamic group, and select Next.
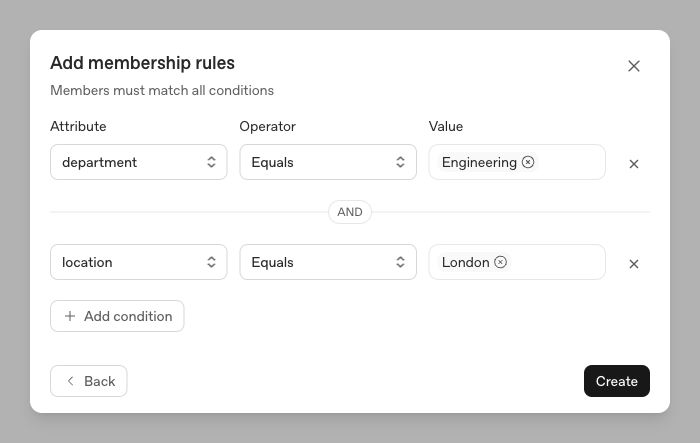
- Under Add membership rules, choose an Attribute, an Operator, and a Value. In this example, select department, Equals, and enter Engineering.
- Select Add condition to add another rule. For this example, select location, Equals, and enter London.
Members must match all conditions. The example below matches members whose department is Engineering and whose location is London.
- Select Create. Open the group’s Settings tab to review its name and membership rules.
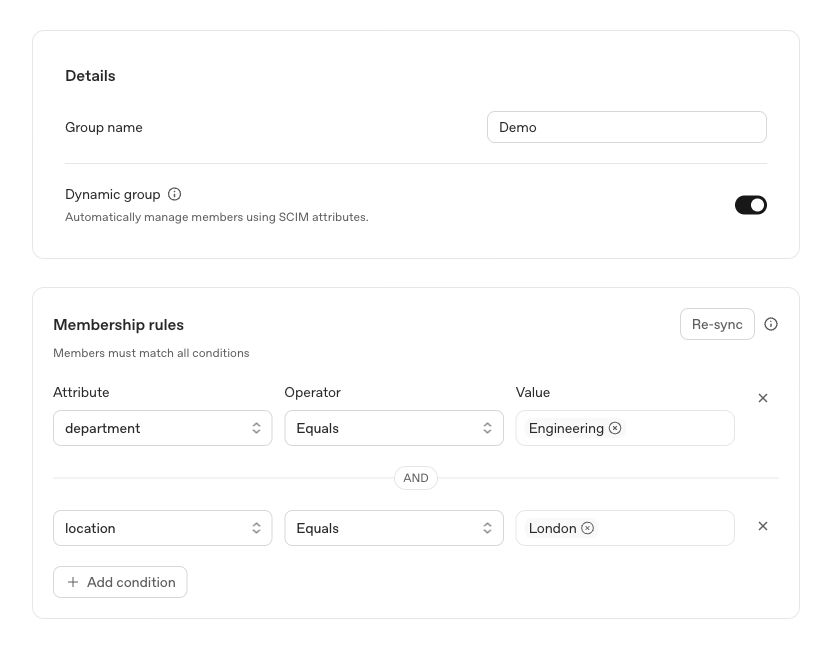
Creating the group saves its membership rules. Select Re-sync to apply those rules to existing workspace members.
Edit membership rules
To change which members qualify for a dynamic group:
- Open the group and select Settings.
- Edit its membership rules and select Save changes.
- Select Re-sync to apply the saved rules to existing workspace members.
Save changes stores the rules without starting a re-sync. Re-sync uses the saved rules and is unavailable while you have unsaved changes.
Re-sync membership
Use Re-sync to re-evaluate the group’s membership against its current rules and the SCIM attributes already available in the workspace.
- Open the dynamic group and select Settings.
- In Membership rules, select Re-sync.
- Follow the Syncing group membership status panel. A queued sync can show Starts in with a countdown before processing begins. You can collapse the panel or use Cancel sync while that option is available.
- After processing finishes, open Group members to review the result.
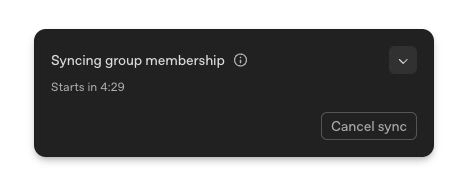
Membership rule controls are unavailable while the sync is active. Canceling a sync can leave membership partially updated. After making any rule changes, save them and run Re-sync again to apply the saved rules. If an expected member is missing, check that their SCIM attributes have reached the workspace and that their values match every condition.
View a member’s SCIM attributes
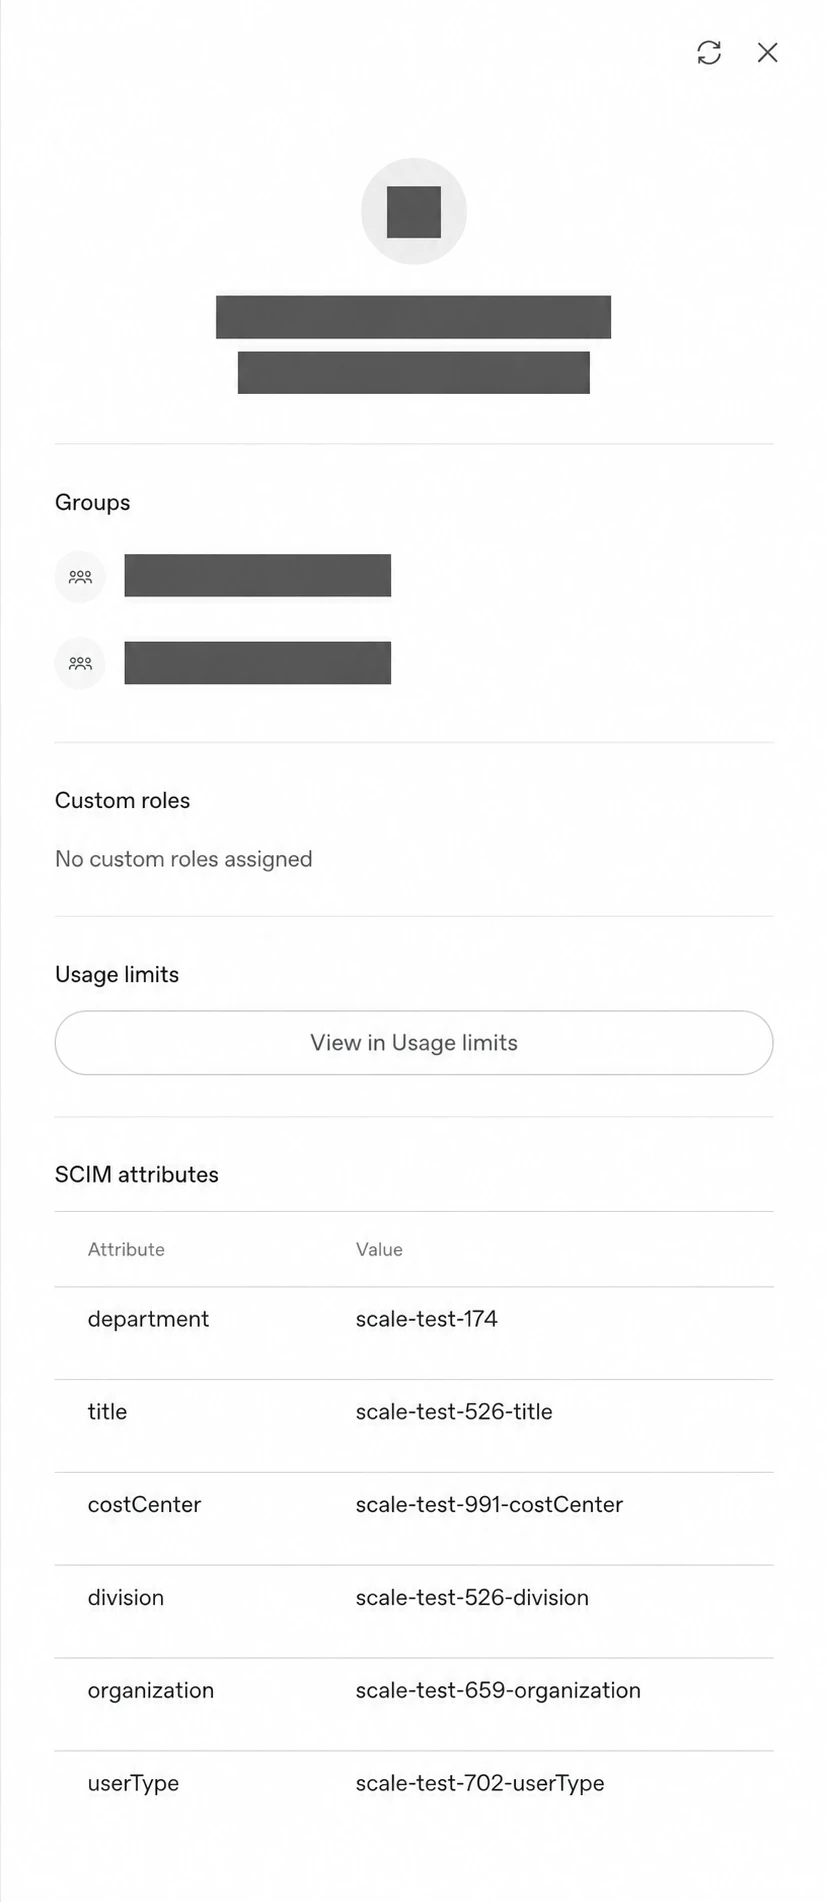
Use a member’s profile card to check the SCIM attribute values available in your workspace and compare them with your dynamic group’s membership rules.
- Under Identity & access, select Members.
- Search for the member by name or email, then select their name to open their profile card.
- Review the SCIM attributes table, which lists each available attribute and its value.
The example below shows a test member’s SCIM values, including department, title, and costCenter.
Supported SCIM attributes
The following table lists the supported attribute names and the user-payload fields recognized for each one. All attributes in this catalog use the string type, including isAdmin.
A plain field name refers to a top-level field. A path beginning with / identifies a field inside the named SCIM extension object. For example, /urn:ietf:params:scim:schemas:extension:enterprise:2.0:User/department refers to department inside the urn:ietf:params:scim:schemas:extension:enterprise:2.0:User object.
| Attribute name | Recognized fields in the SCIM payload |
|---|---|
department |
department/urn:ietf:params:scim:schemas:extension:enterprise:2.0:User/department/urn:scim:schemas:extension:enterprise:1.0/department/urn:scim:schemas:extension:enterprise:2.0/department |
title |
title |
manager |
manager/urn:ietf:params:scim:schemas:extension:enterprise:2.0:User/manager/value/urn:ietf:params:scim:schemas:extension:enterprise:2.0:User/manager/displayName/urn:scim:schemas:extension:enterprise:1.0/manager/value/urn:scim:schemas:extension:enterprise:1.0/manager/displayName/urn:scim:schemas:extension:enterprise:2.0/manager/value/urn:scim:schemas:extension:enterprise:2.0/manager/displayName |
costCenter |
costCenter/urn:ietf:params:scim:schemas:extension:enterprise:2.0:User/costCenter/urn:scim:schemas:extension:enterprise:1.0/costCenter |
division |
division/urn:ietf:params:scim:schemas:extension:enterprise:2.0:User/division/urn:scim:schemas:extension:enterprise:1.0/division |
organization |
organization/urn:ietf:params:scim:schemas:extension:enterprise:2.0:User/organization/urn:scim:schemas:extension:enterprise:1.0/organization |
userType |
userType |
country |
country |
isAdmin |
isAdmin |
location |
location |
For manager, the catalog recognizes the top-level field and the nested extension value or displayName fields. For country, send the top-level field shown in the table.